A Step-by-Step Guide to Adding a Custom Calendar to Notion
Updated: January 18, 2026
Integrating a custom calendar into your Notion workspace can supercharge your productivity, helping you organize tasks, track performance, and focus on active months. This guide walks you through adding a custom calendar to Notion step by step.
Step 1: Create a New Calendar #
If you don't have an account, read this guide to set up your account.
After linking your Notion workspace, open your workspace page and click Add calendar in the Calendars section. You can also use Add new → Calendar from the dashboard.
- Click "Add calendar": This opens a short form.

Step 1.1: Enter Basic Calendar Details #
- Calendar Name: Provide a name (e.g., "My Calendar").
- Workspace: This should already be selected. It's where this calendar will be stored.
- Notion Database: Pre-selected with the workspace's primary database (marked Default). Choose another one if this calendar should read from a different database. If your databases are still loading after connecting Notion, wait a moment — NotionStats keeps checking — or click the refresh icon.

Step 1.2: Map Database Columns #
- Date Column: Pick the date column from your Notion database.
Note: This column should be of type "Date" in your Notion database.
- Value Column: Select the value column that reflects numerical data on your calendar (e.g., "Amount", "Profit", "Cost").
Note: This column should be of type "Number" in your Notion database.
- Click the Create calendar button. You will be redirected to the calendar settings page, where you can edit your calendar.
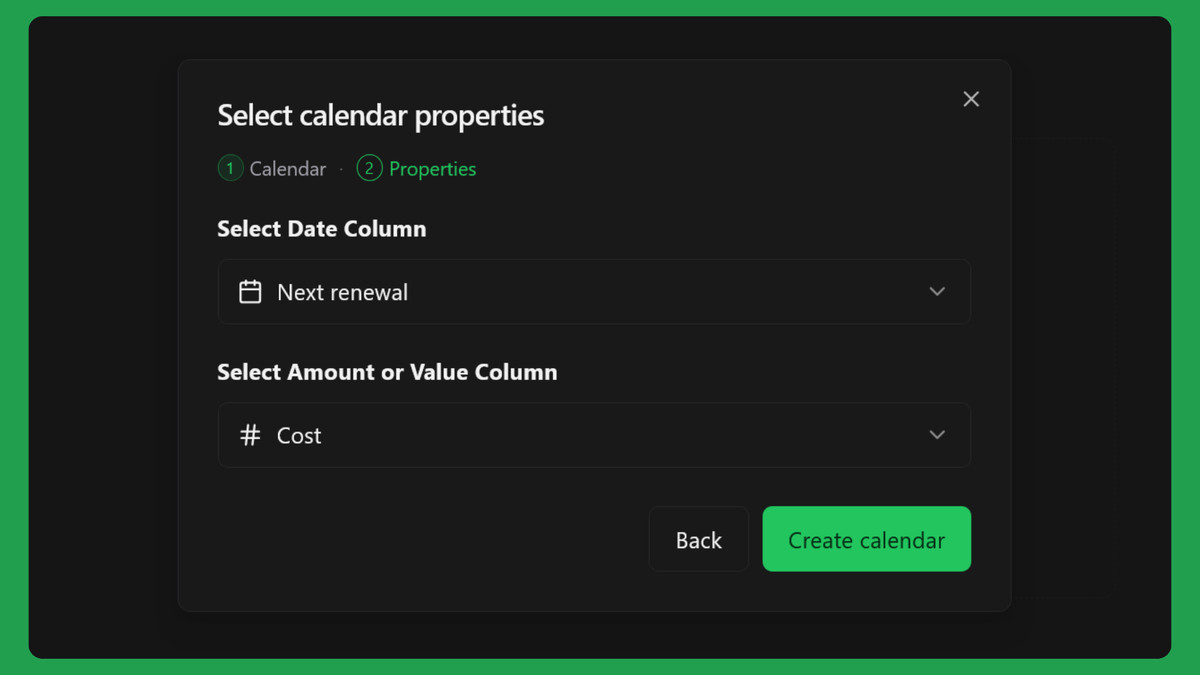
Step 2: Customize the Calendar #
After you are redirected to the calendar settings page, you can customize the following settings. Changes are saved automatically as you make them — the page shows Saving… and then All changes saved, so there's no Save button.
- Value Name: Customize the name of the value displayed on the top right of the calendar (e.g., "Amount", "Profit", "Total").
- Label Text: Add a label to display alongside your values (e.g., "$", "R", "%").
- Label Position: Choose whether the label appears before (prefix) or after (suffix) the value.
- Decimal Places: Select the number of decimal places to be displayed (0-4).
- Show Active Months Only: When enabled, the calendar will only show months with activity.
- Show Weekends: When enabled, weekends will be shown on the calendar.
- Filters: Use filters to narrow the data shown on your calendar.

Step 3: Copy and Embed the Calendar Link #
Your new calendar appears in the Calendars section of your workspace page (and on the calendar list) as a card displaying:
- The Calendar Name.
- The linked Notion Database Name.
- A Settings Icon to customize your calendar.
- A Copy embed link icon to copy the embed link. You'll also find Copy embed link on the calendar settings page.

Click Copy embed link to copy it. Paste this link into your desired Notion page.
- In Notion, directly paste the link.
- Click Embed
- Resize the embed as needed
Shown with a chart. Calendars embed the same way.