Step-by-Step Guide to Adding Custom Analytics to Notion with NotionStats
Updated: April 6, 2026

This comprehensive guide shows you how to create custom charts and calendars, link them to your Notion database, and track your data visually to gain better insights and boost productivity. With NotionStats, managing your notion analytics becomes efficient and intuitive.
Table of Contents
- Step 1: Sign Up for NotionStats
- Step 2: Create a Workspace
- Step 3: Link Your Workspace to Notion
- Step 4: Add Custom Charts
- Step 5: Add Milestones
Step 1: Sign Up for NotionStats
Get started by creating an account. Once you've successfully signed up, you'll be redirected to your dashboard page, where you can begin setting up your analytics tools.
Step 2: Create a Workspace
After signing in, click on the "Add Workspace" button and provide a name for your workspace. This workspace will act like a folder to organize and store your charts and calendars for the linked Notion database.

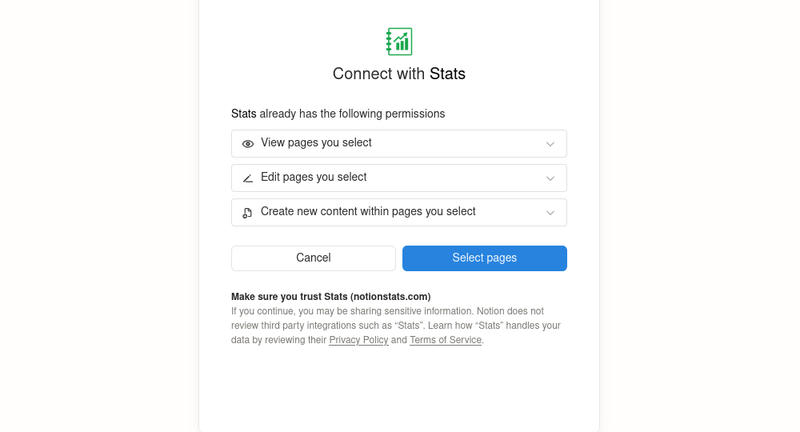
Step 3: Link Your Workspace to Notion
Next, connect your workspace with your Notion database. Simply follow the prompts to authorize NotionStats to integrate with your Notion account.
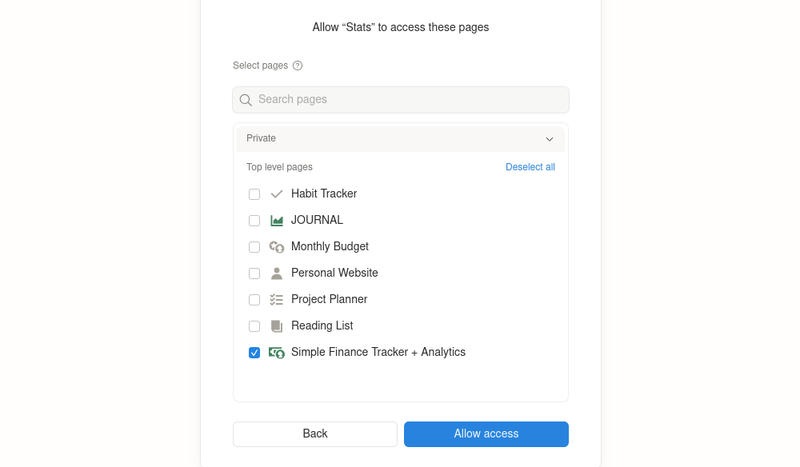
- Click "Select pages" button to share your notion workspace.
- Next, check the box for the page you want to add analytics to.
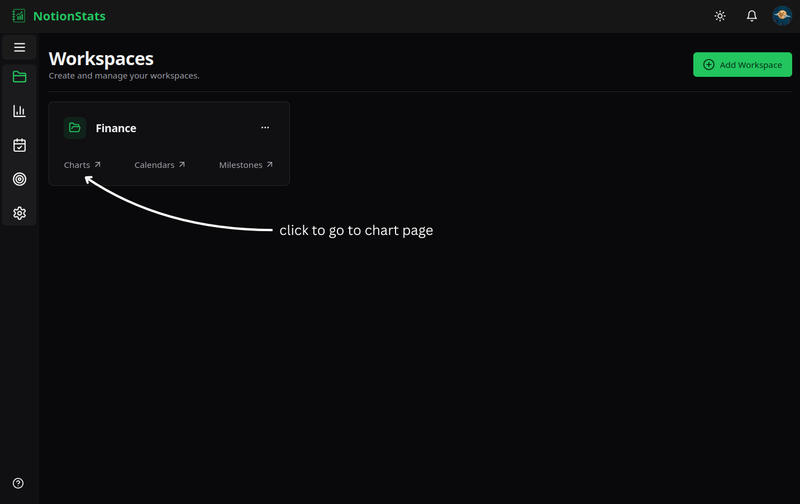
Step 4: Add Custom Charts
To create custom charts for visualizing your data, click the "Charts" link on your workspace card.
Follow the detailed Chart Creation Guide to create your first chart.
Step 5: Add Milestones
To track your progress with visual milestones, click the "Milestone" link on your workspace card.
Use the Milestone Creation Guide to set up your first milestone.
By completing these steps, you'll have powerful analytics tools integrated into your Notion, allowing you to track your performance with ease. Start optimizing your workflow today with NotionStats!
Suggested Posts

How to Create Custom Charts in Your Notion: A Step-by-Step Guide
Follow this step-by-step guide to create and embed custom charts into your Notion pages...
Read more
How to Create and Track Milestones in Your Notion Workspace: A Step-by-Step Guide
Learn how to create, customize, and embed milestones in your Notion workspace. Track progress across finance, subscriptions, habits, fitness, and more with auto-updating goal displays.
Read more
How to Structure Your Notion Finance Database for the Best Analytics
Set up a Notion Transactions database that unlocks accurate income/expense, net worth, and category analytics in NotionStats.
Read more